Sign up for free, create your event, publish it and share the link. Most organizers are selling within 15 minutes. Listing is free: ticketHUB takes 12% of each paid ticket from your payout, and buyers pay only your ticket price.
You need: your event date and venue, your ticket types and prices, and a poster or photo.
1
Sign up as an organizer
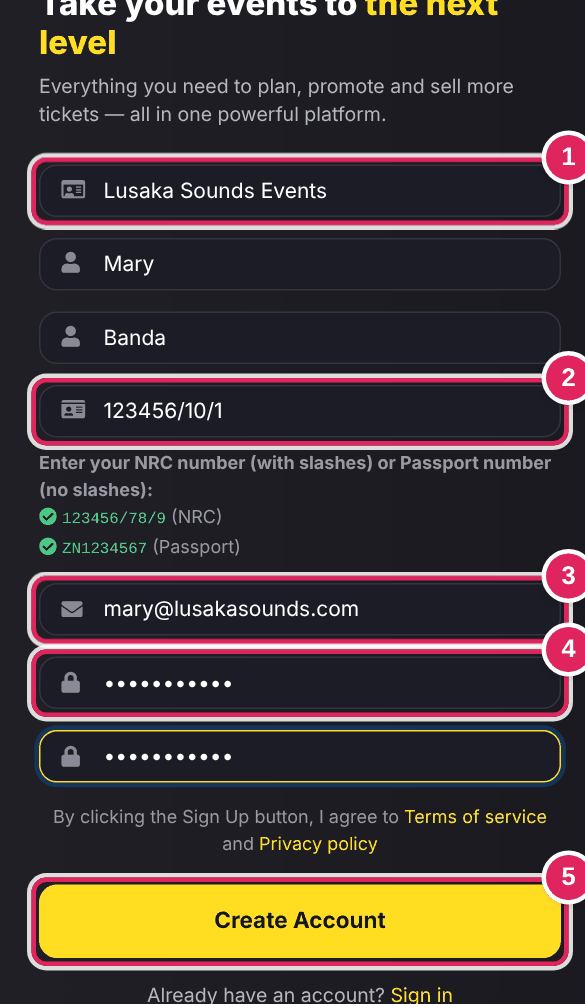
Open the organizer sign-up page (Sign up at the top of the site, then Organizer).
1 Your organizer name. This is the name buyers see.
2 Your NRC number (with slashes) or passport number. You use it to sign in.
3 Your email.
4 A password (type it twice).
5 Click Create Account.
2
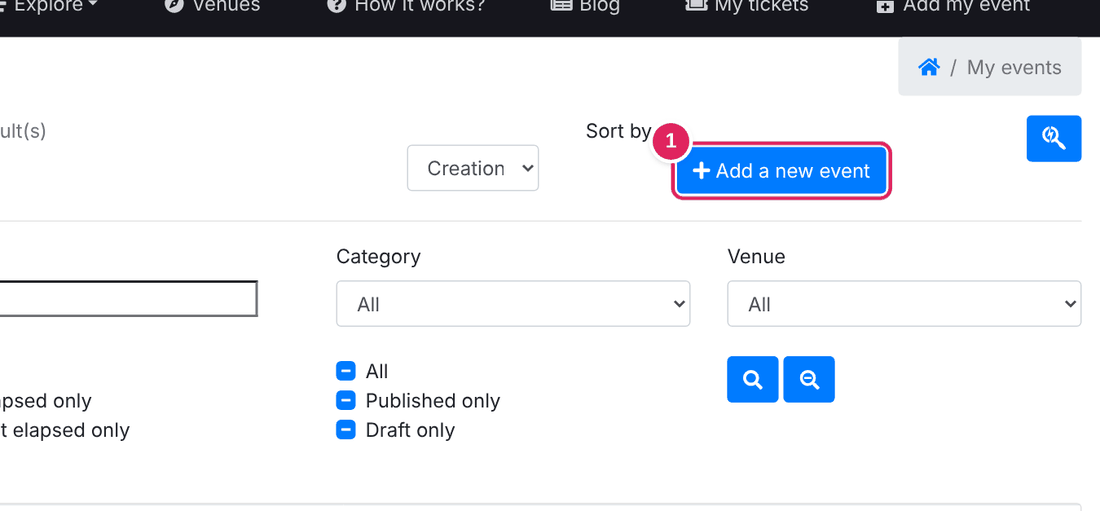
Go to My events and click Add a new event
In your dashboard, open My events and click 1 Add a new event.
3
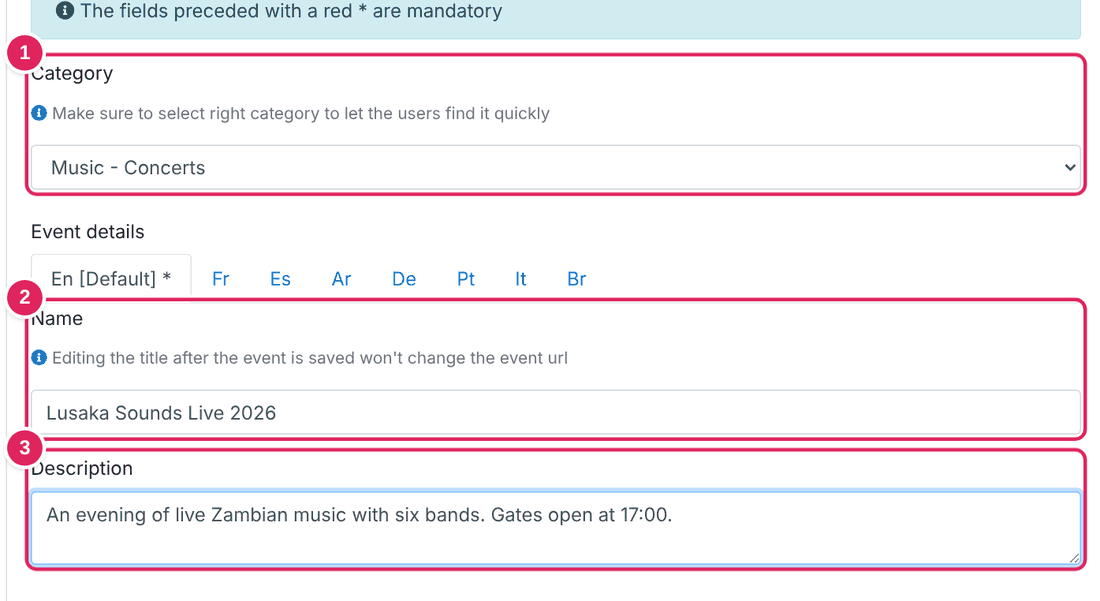
Name and describe your event
1 The category, so buyers can find you.
2 The event name.
3 A description: what it is, who is performing or playing, gate time and what is included.
Further down, leave Public Event and Tickets for an event selected for a normal event. Choose Memberships for a gym or club, or Collect participant details: Yes for races and tournaments.
4
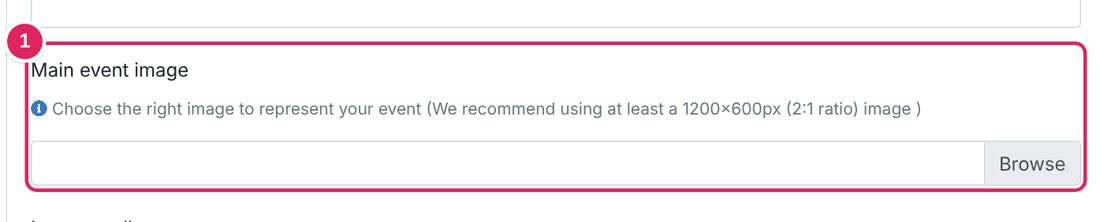
Add a main image
1 Upload your poster or a photo. A wide image works best (1200 × 600 pixels).
5
Add the event date
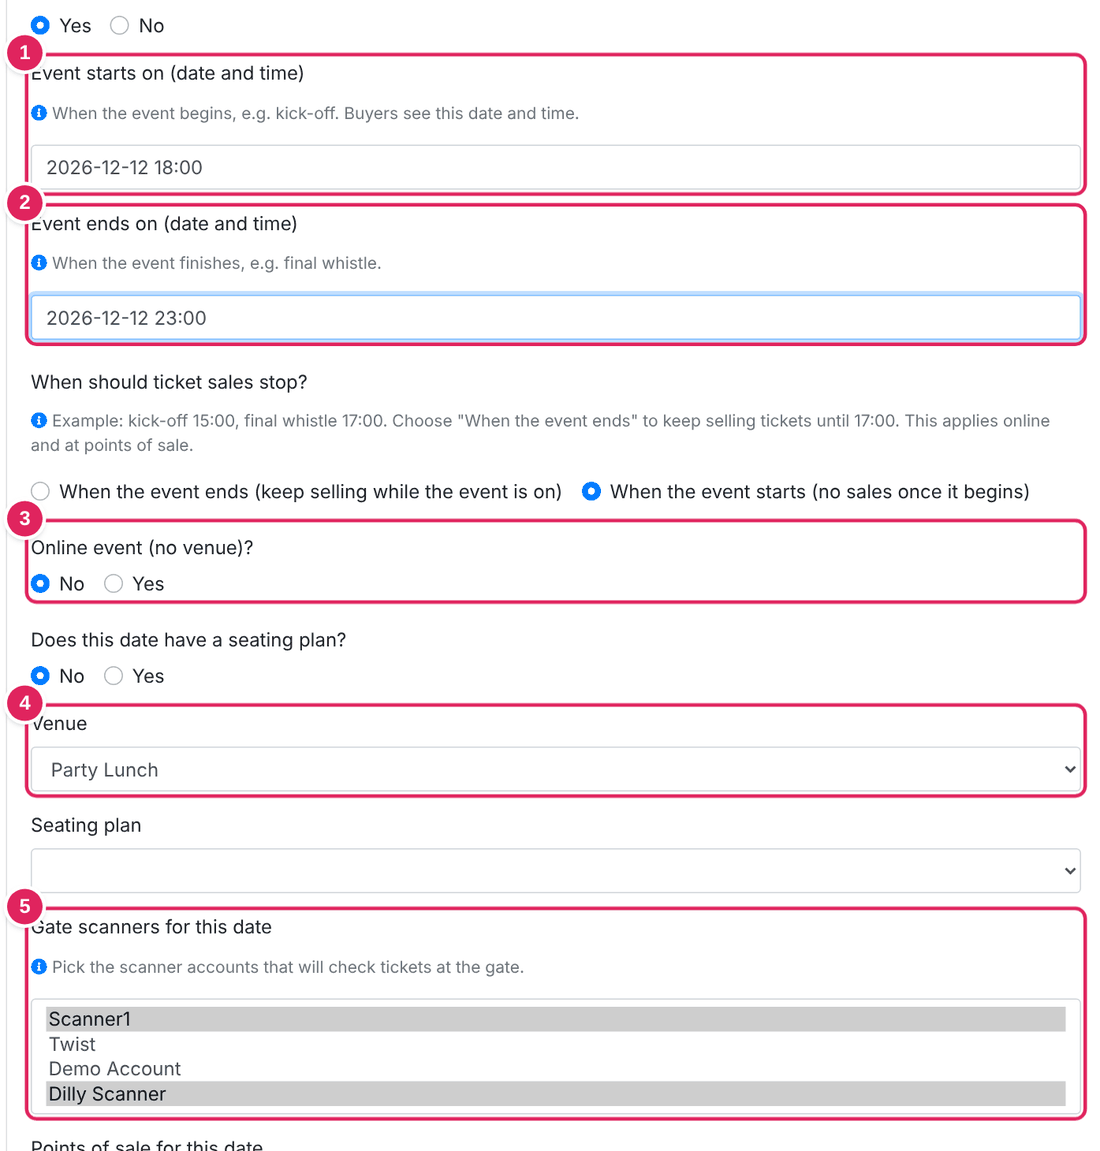
Under Event dates, the first date is already open. Fill in:
1 When it starts.
2 When it ends.
3 Online event: No for a venue; Yes for Zoom, Teams, Google Meet or a live stream.
4 The venue. If it isn't listed, add it first under My venues.
5 The scanners that will check tickets at the gate (see setting up scanners). Hold Ctrl to pick several.
6
Add your tickets
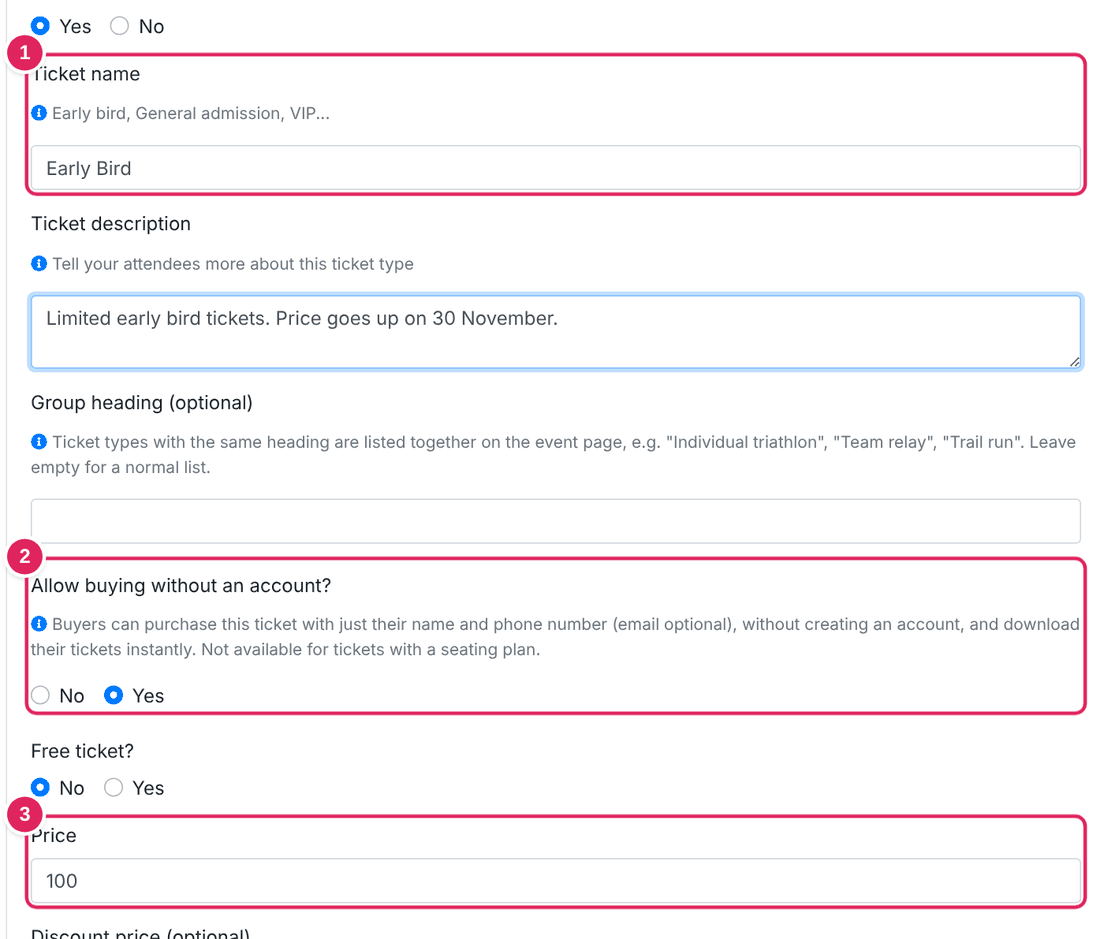
Under Event tickets in that date, the first ticket is already open.
1 The ticket name, for example Regular, VIP or Early Bird.
2 Allow buying without an account: Yes. This gives buyers the one-minute mobile money checkout.
3 The price in Kwacha. For a free event, choose Free ticket: Yes.
7
Set how many tickets you sell
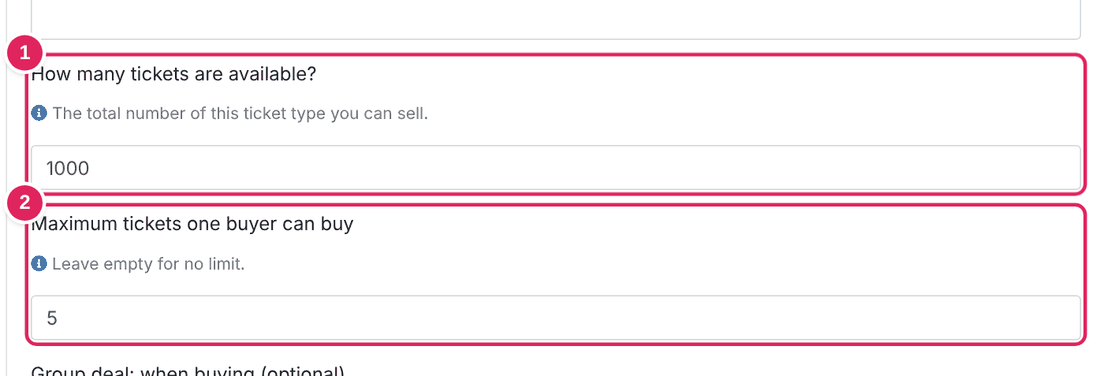
1 How many tickets of this type are available.
2 The most one buyer can buy at once.
Add another ticket type with Add a new ticket, or another day with Add a new event date.
8
Save
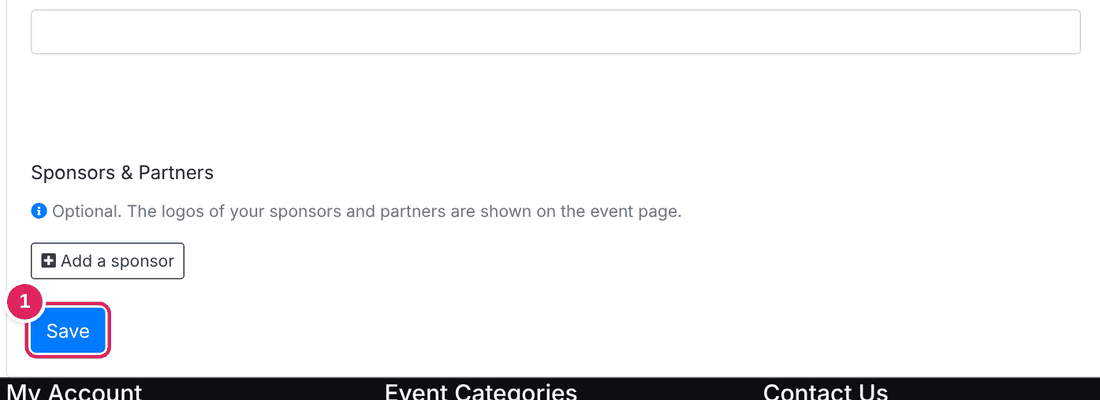
1 Click Save at the bottom of the page. Your event is saved as a draft, so nobody sees it yet.
9
Publish and share your link
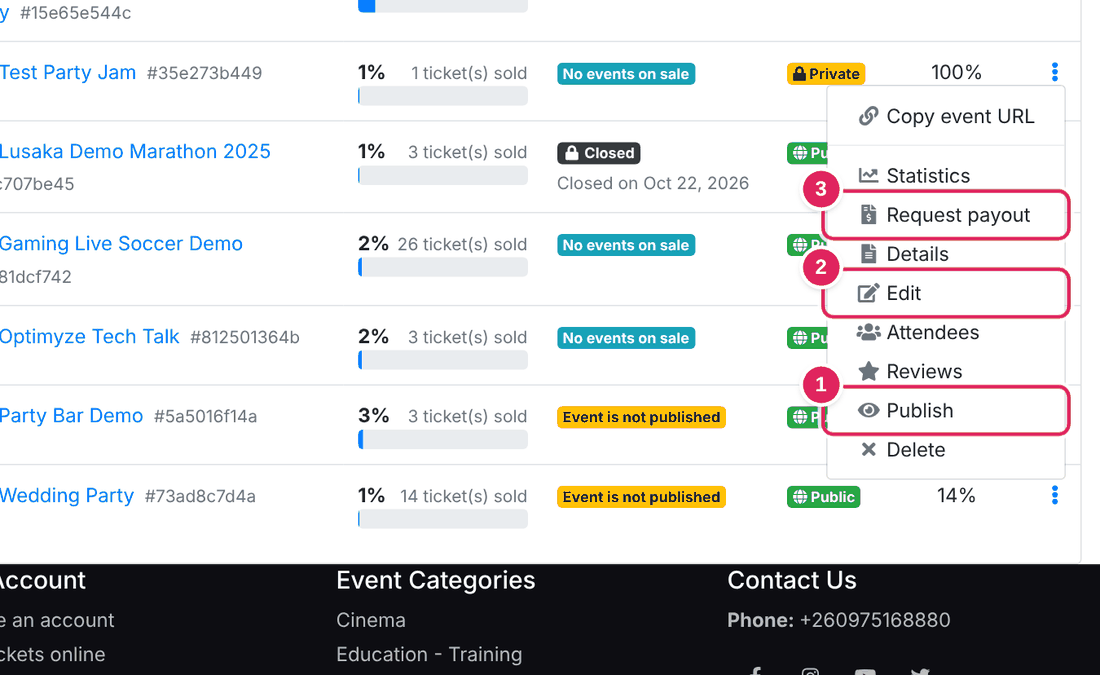
In My events, open the ⋮ menu next to your event:
1 Publish puts your event live.
2 Edit lets you change it at any time.
3 Request payout is where you get your money.
Then open your event page, copy the link and share it on WhatsApp, Facebook and Instagram.
Tips that sell more tickets
- Use a clear poster and put the date, venue and gate time in the description.
- Early-bird prices: set a discount price and an end date on a ticket.
- Promo codes and group deals (for example buy 5, pay for 4) are under Promo codes and on each ticket.
- Need help setting up? Call or WhatsApp us on +260 975 168 880.